Dam right?Quote:
Originally Posted by §partan 8
That was my second favourite level and it was the fucking first one.
Printable View
Dam right?Quote:
Originally Posted by §partan 8
That was my second favourite level and it was the fucking first one.
In addition to Disaster's recent critique, I will add what I PM'd to English Mobster, because I think it could benefit everyone who would like to convincingly portray a scene.
Stick to copying what you see, but pay much closer attention. I really don't have any modeling tutorials for this architecture type.
Really just pay more attention to how things are connected. I mean that literally. Everything is connected. When you go with separate structures like parking garages or stores, you're completely breaking the design language. Everything is multi-tiered, connected, built into, around and on top of each other.
Pay close attention to the way a surface translates from one to another. Not everything is a completely angular move from one surface to another. Sometimes you will see that there's a soft radius from the front of an overhang to the roofline, things like that.
You're also getting the scale of a lot of things very wrong, such as your escalator, though I think that may have to do with being able to read the concept art. For an untrained eye, the perspective could seem forced or overtly dramatic.
Also, the way you're doing damage is for brick and mortar type of buildings, and it doesn't portray that very well, even. The buildings in New Mombasa are metal. Look at the concept art, how the metal is sheared up like a torn tin can or an aluminum tin can. Paneling gets bent, crumpled, etc.
Take a look at this concept art.
http://www.bungie.net/images/Games/J...Concept-12.jpg
you can see here that the hood of the car, the two street lights, the palm trees, etc, all fall in ONE direction. This is because of the blast wave. Everything in a small location such as this will fall in one direction. Away from the center of the blast, just like with the damage from Hiroshima, Nagasaki, and the Tunguska blast site.
All of these things must be taken into account when attempting to convey the scene.
This is retty trivial, but that's the gull-wing door of the car, not the hood. You'd think that the shockwave that snapped trees like toothpicks would rip that door off, but it didn't.Quote:
Originally Posted by SnaFuBAR
Learned to texture (well, metal stuff, at least):
Yay or nay?
Its an improvement. Its still to noisy and the scratches are pretty bad. The ODST textures are also dark with a high amount of specular.
too cartooney or cell shadey?
I dont know, but it looks too clean...yet too cloudy.
I'd have to see it ingame.
So down the brightness, up the contrast a bit, and clean it up a bit?
It doesn't tile properly either. It doesn't look bad, but it doesn't look real either. You only scuffed up the one weird panel on the wall, why no edges around the windows?
Also on the bottom left part of the windows there's a weird edge on the top part.
..._________
./^ Right here
|
.\_________
AHHH, they're windows!
:P
They're windows?
:raise:
I actually have an old model of dam that i started on. it's modeled and uv'd up to the first two sections right up to the dual sliding door section. If you want to finish it, be my guest
lul that's what I made out of it because of how you have the braces going across the dark places... and frames around them Makes them look like a futuristic window inset type thing. The darker color looks like the traditional bungie blue for their glass.Quote:
Originally Posted by English Mobster
mis-observation, but regardless, all the damage in the scene is telling. v:maddowns:vQuote:
Originally Posted by Con
Quote:
Originally Posted by PenGuin1362
The funny thing is that I don't know if I want to finish my dam model. I don't think the gameplay will be good on that map.
http://img267.imageshack.us/img267/2...dfrontview.jpg
the lines are not my fault, its the uvs. i know the ears are weird, because i sux at making custom ones so i just googled up some ears and photoshoped them in. i am new at skinning so yea. the eye brows suck also i know.
http://img255.imageshack.us/img255/1...adtextureh.jpg
E. oshi-, need to resize image :C
EE. oshi-, forgot to post link to the model: http://www.fpsbanana.com/models/974
http://i435.photobucket.com/albums/q...westgate-6.jpg
I haven't fucked up yet, have I? :ohdear:
Obviously no smoothing done at all.
E: @noober: Unless the eyes are going to look different, can't you just overlay one eye on the UVW on top of the other and use that space for something else?
Also, to solve the UVW problem, just color about 2-3 pixels outside of the borders. It'll show up like that ingame, if you're not careful.
roads still look wrong
Much better. Keep doing that.Quote:
Originally Posted by English Mobster
e: actually, scratch that. You still have shit triangulation. Try using poly instead of mesh, to get a better feel for modeling in quads. Also, try to be more deliberate about your positioning. A lot of the geometry looks rather haphazard, for example, the lamp posts.Try to do more than just extrude edges (or whatever technique you're using) until you've got the shape; try really thinking about the shape you want to produce, where its boundaries and visual edges are, and what its construction might look like. You don't have to be an architect or a mechanical engineer to think that lamp posts are going to be more than one piece, and yet yours look like they were cast solid.
That's extremely unsettling. I don't know the first thing about skinning, but I know you're doing it wrong.Quote:
Originally Posted by n00ber
e: looks like he's related to Buster.
I'm using Poly, although my triangulation does suck, largely on the funny thing to the far right of the picture and the sidewalk border to the far left.
E: @Ganon: The reason why the road looks like it is sloping downhill would be because that road is going downhill.
Unlike my last one, this model has an even slope on the road the whole way down.
Yes. the road. Keep the road surfaces planar except for angular slopes (even though the slopes have a smooth rounded surface.
http://www.bungie.net/images/Games/J...Concept-12.jpg
See the road. Model everything just like in this picture as this is a good representation of all architecture in ODST.
Make your road wider and not as set into the road. Make the curb ramp longer. Make the road planar except in specific locations as shown above.
E: Extruding edges is a shit way to model bsps like this. Make every piece individually. Make the lamp posts in a different mesh with its own unique shape and details. Do the same for buildings and anything else made. Then, in max, combine the assets together in the final map model.
Your black seam is caused by a lack of edge padding on your texture.Quote:
Originally Posted by n00ber
i know it suxs D: he looks like hes on crack or sompthing :/ ive never textured face or anything like that before so its bound to suck. lol why you stealin my sexy pix for your avatarness :CQuote:
That's extremely unsettling. I don't know the first thing about skinning, but I know you're doing it wrong.
e: looks like he's related to Buster.
Dis, how'd you get so smart at this stuff?
Hey Mobster, could I get a whirl at texturing that?
By making errors and figuring out what causes the errors. On alot of textures I made in my spare time about a year ago, I would get alot of dark black lines arround the UV seams which, through trial and error, I found to be that the black space around the texture was bleeding through to the actual texture because of compression and the way rendering engines blur textures to prevent a pixelated appearance.Quote:
Originally Posted by killer9856
But how did you learn all the NEW techniques? Where'd you find the way to improve your skills
http://www.majhost.com/gallery/Talon...754_10m50s.png
Tried tapering it in a few different ways, but even at 1° it ends up looking rather fat somehow, so I reverted it.
idk about the glass, if I keep it I'll probably move the 45° bits all the way to the end.
@killer
uhh
you're seriously asking that?
trial and error
It's like asking a caveman how he learned to make fire.
Well thats not always true. I learned some of the things I use in my workflow from friends.Quote:
Originally Posted by NuggetWarmer
http://i435.photobucket.com/albums/q...westgate-7.jpg
Did I fix things, or make them worse (lol)?
I like everything except the lightpost.
Lightpost removed, no issues there.
Going to just start with a base and remake the lightpost as its own object, as suggested earlier.
Since there will be mulitple lightposts, all I need to afterwards would be duplicate them.
Also, I don't like that wall at the left. I'm going to go place some shops or integrate it into something before Snaf yells at me again. :3
http://i435.photobucket.com/albums/q...westgate-8.jpg
Last post for now, unless someone tells me to fix something and I make another render to prove it. :p
Do us all a favor.
Don't randomly inset/extrude for detail, it looks both hideous and retarded. :gonk:
btw con some very important observation! that car does not have a gull wing door but a scissor door!
Few things... overall you're doing it wrong.Quote:
Originally Posted by n00ber
The eye for example... you painted the eyelid on the eyeball for some reason... your geometry should make that shape for you, you shouldn't have to paint it on. Plus... when you go to move that eyeball (because you did make a cube, and smooth it a few times... then stab it inside his head...) you'll want to be able to actually move it around without the eyelid following it like that... not fun.
Also, use photo reference for everything there, not just the ear. You're still a novice at this stuff, so you don't know how to add which colors into certain places to make the diffuse map look realistic. Right now you just have a flat "skin" tone with shades of gray painted on top of it.... that's not what people's faces look like unless if we've been standing over a fire all day with smoke and stuff billowing in our face to just dirty it up.
Lets take this guy for example.
Look at how the different colors in his face blend into eachother, and where the different colors are.
For a better look at how it should look in your texture... looky here.
Notice how pretty much anywhere that there is small amount of flesh between the skin and bone you end up with a more yellowish tone (cheekbones, bridge of nose.. stuff like that) and notice how anywhere that a lot of blood would go through you end up with a lot more red in that area (cheeks)... and areas that are more... sensative? (eyelids and lips) have some blue to them.
These references are a bit shoddy becuase of how he used straight photo reference for most of it, and so you get a lot of shadows and such from that already built in. If you're going to be painting it all rather than using a photo reference you'll want to run an Ambient Occlusion pass on your model to get a base texture file to start with which will basically be shadows and such for your map.
Pictures from the rambo model came from here.
If the camera would zoom out a little bit, you would see that that little "inset/extrude" in the corner there is actually a bit more than that.Quote:
Originally Posted by CLS{GRUNT}
Quote:
Originally Posted by English Mobster
Extrudy bits.
They're a cheap way to add detail, and it doesn't really work.
Attempted this and failed miserably... I seem to suck at modelling nowadays.
*Closes 3ds max and gives up*
Here is a render, it looks like shit. Literally...
Unless you're doing forerunner stuff. Lol. Then it works to an extent, as long as you mix it up.Quote:
Originally Posted by Con
It works great on anything else too; unless thats all your doing and doing it alot.Quote:
Originally Posted by Siliconmaster
):Quote:
Originally Posted by Hunter
I dont even know where some of those details came from D:
http://img81.imageshack.us/img81/5193/scenerywip.jpg
idk i was bored. wood textures arent mine, i got them from cg textures, tho the uvs are mine. ignore the horrable uv on the crate on the right right now. trash can textures are mine tho
There ok, for simple shapes.
The pallet could use nails so they look together. And the trashcan has too much grunge, and I dont really see how it could get scratches. I suggest making it more stainless steel, or plastic.
Texture work could have been better.
tis stainless steel. i only used 1 grungebrush at 20 percent opacity :C. whatever, i guess ill take some of the grunge off
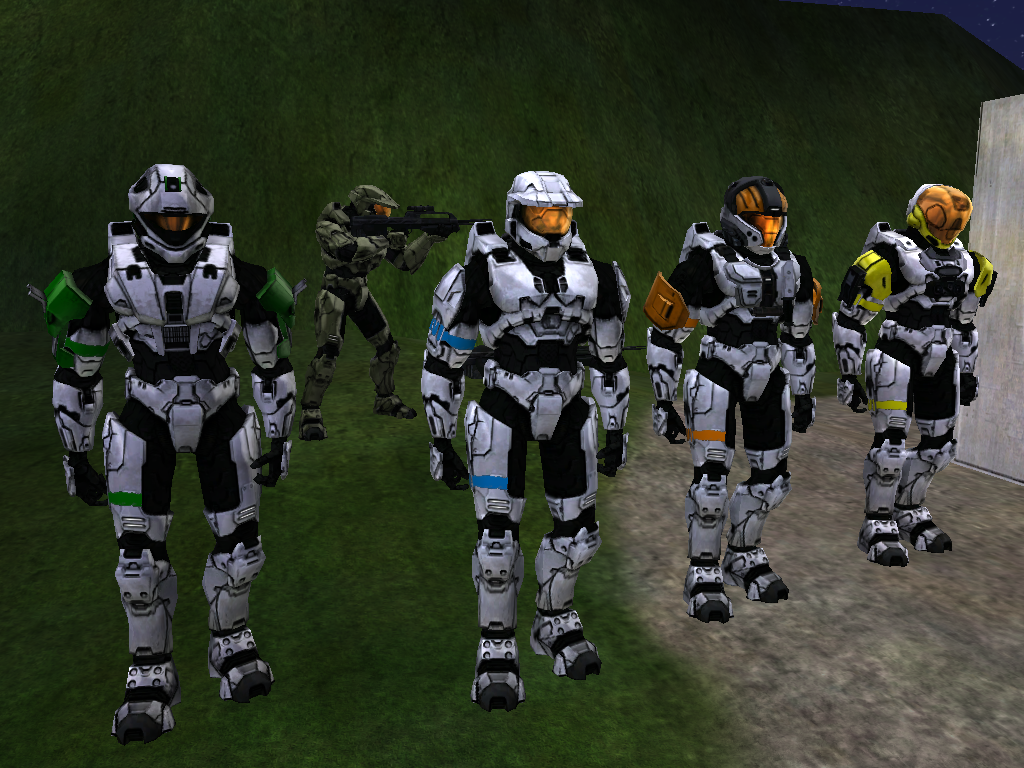
^the bottom one is just to show the difference bitmaps from MP and SP and the visor has been fixed which shows on the top...
Don't ignore my post like you guys did awhile ago since the only crit I can get is from halomaps mostly which bites sorta. The brightness is fine on it, it's just a part of the map that dims it or so. Anything I should fix other then the CQB visor. I aimed for a clean look on the MP like in the retail so.
E: damn rubber, to black, gotta fix the multi-purpose
Campaign looks a touch dull (the color, not the reflection) to me. The visors also look a little under-saturated.
The campaign color is actually the halo 3 retail color values that delta4097 gave me, even so I think I should brighten it up abit. And the visors, which one are you talking about, 1st pic or 2nd? since the 2nd picture is old and the 1st picture is the most recentQuote:
Originally Posted by teh lag
Try modeling something from a reference picture. Try modeling this flashlight.Quote:
Originally Posted by n00ber
http://img200.imageshack.us/img200/1641/14075g1.jpg
Your call, either the left or the right one.
http://i435.photobucket.com/albums/q...gatenormal.jpg
Any better at all? :p
In both I feel that the visors' colors are too muted.Quote:
Originally Posted by Spartan094
Youtube is hating me right now
http://www.llamajuice.com/img/youtube%20hates%20me.JPG
So I have to post a link to this, rather than being able to embed it....
It's a WIP idle/death animation for the cybermech enemy in my game.
.........vv....................................... ..vvvvvvvv
If the AVI doesn't work for ye, try the quicktime
.........^^....................................... .^^^^^^
Looks a lot better, Jay, now make your storefront a lot less boring ok?
I am scraping that concept i was modelling becase it was a pile of shit, a newbi could of done better in fucking Google Sketchup :/
Let me fill you all in on my situation. I think I am suffering from depresion, or something like that, fuck knows. I just have loads of fucked thoughs and random shit running through me when I think.
Well, basically that means that I cant concentrate much, I have tryed to redesign the weapon in my mind. I can see it in my head, and it looks fucking amazing.. but i can only see bits of it lol, so sometime I will attempt to draw it and fit it together, I am sure you all would be imressed if I managed to get it 3d as it should it the Halo style nicley.
-Moblie post-
Sounds like ADHD to me.
http://img36.imageshack.us/img36/906...gatenormal.jpg
Keep that piece, get rid of the rest, it's terrible.
Quote:
Originally Posted by Llama Juice
http://img149.imageshack.us/img149/1153/flashlight.jpg
Proportionally a few things are a bit off. The button size seems a bit small, but that might be because you ignored how the handle gets skinnier past the textured part of the grip. You also ignored the lip where the lamp goes inward where the light comes out.
The point was, that when you have a reference image your work will turn out a ton better... which it did. Before you start on any project do some research and find a few images of what you want to model. Try your hardest to steer away from taking reference images from games because when you do most novice artists will stop at the detail level that the original artist stopped at.
I chose to give you the flashlight because it is a simple shape, just a series of extrudes.. but I wanted you to pay attention to certain things and was wondering if you'd attack the grip or not. I'm disappointed that you ignored it, but it's also something that'd jack the poly count WAY up.
I'd like to see you attempt the grip, just to see how you'd go about doing it. With the proper setup you could make that grip in about four minutes, but I want to see you go through it and post your results.
i did model the grip, and i was going to bake some normal maps, but max seems to not like it when i try to bake normal maps and the normal map doesnt come out correctly.Quote:
Originally Posted by Llama Juice
That's because you're doing it incorrectly.
Out of interest I tried exporting a Hammer map file as a .DXF and importing it into 3DS. This is what I got:
http://i79.photobucket.com/albums/j1...in/Render1.jpg
http://i79.photobucket.com/albums/j1...in/Render2.jpg
(Ignore that floating block in the corner, I used it to shape the windows and door)
Imported brushes perfectly except that all the faces had to be flipped. Materials and props aren't exported. It's definitely not the way to go if you're going for poly optimisation; this scene is just over 1500 polys alone (in case you're unaware, Hammer uses brush(block) based geometry). If I wanted to I could probably go back and recreate all the faces/delete unnecessary faces and see how many polys it is then.
Not really looking for crit, just thought it would be interesting.
Hello, hello.
I've been looking into remaking some TF2 maps in a Halo style (more toying around with the idea) and sticking them into H1 (Ex. one of the maps I was thinking about was taking Dustbowl and completely remodeling it into a UNSC outpost in Siberia, while retaining the same shape and gameplay and sticking it into H1).
How'd you find that? Any plugins needed?
No plugins needed, Hammer can export as a DXF from the file menu and then 3DS can easily import the DXF. Easy as. Mind you if you wanted to import a fully developed map like dustbowl you'd have to do some major tweaking in hammer. You'd have to remove the various trigger and clip volumes. A lot of props are used aswell and they won't transfer over. You'd get the basic geometry brushes and I'm not sure if displacements will transfer.
E: Actually if you fixed up the faces it could be suitable for Halo, I just quickly imported a Spartan model and the scales match up pretty closely:
http://i79.photobucket.com/albums/j1...in/render3.jpg
EE: I'm in the process of importing Dustbowl into Max, completely unedited. So far 25% imported after ~20 minutes. See how this goes...
EEE: Max spat the dummy(read:crashed) at 33%. Basic geometry only...
http://img256.imageshack.us/img256/2655/lolbarrels.jpg
barrels anyone?
the tops dont look right.
they should be more like |_______|
There goes that plan then. :pQuote:
Originally Posted by Darqeness
I think you can use crafty to import tf2 maps as well. It only exports as .obj and it normally has flipped triangles everywhere.
They're called drums.Quote:
Originally Posted by n00ber
For such a simple model, it's very inaccurate.
http://img442.imageshack.us/img442/3669/barrels.jpg
someone needs to teach me how to fix these black seams :/
Quote:
Originally Posted by mech
i just looked up metal barrels on google images, than made kinda my own thing from the pics there so whatever
http://www.trendir.com/archives/bris...collection.jpg
thats the ref i used for the model, though i ignored the funnal thing on the top
those are bathroom sinks and that's the reason the tops look weird.
:lmao:
oh christ :lmao:Quote:
Originally Posted by SnaFuBAR
354 triangles
172 polygons
i knew that :saddowns:Quote:
Originally Posted by SnaFuBAR
Your most useful crit ever :iamafag:Quote:
Originally Posted by SnaFuBAR
I'm going to attempt to finish this today
http://img338.imageshack.us/img338/6976/niggin.jpg
still needs correct lighting, depth, vegetation, trees, etc.
Mountain in the back looks good so far.
Looks like Sierra 117 from Halo 3
Obviously.
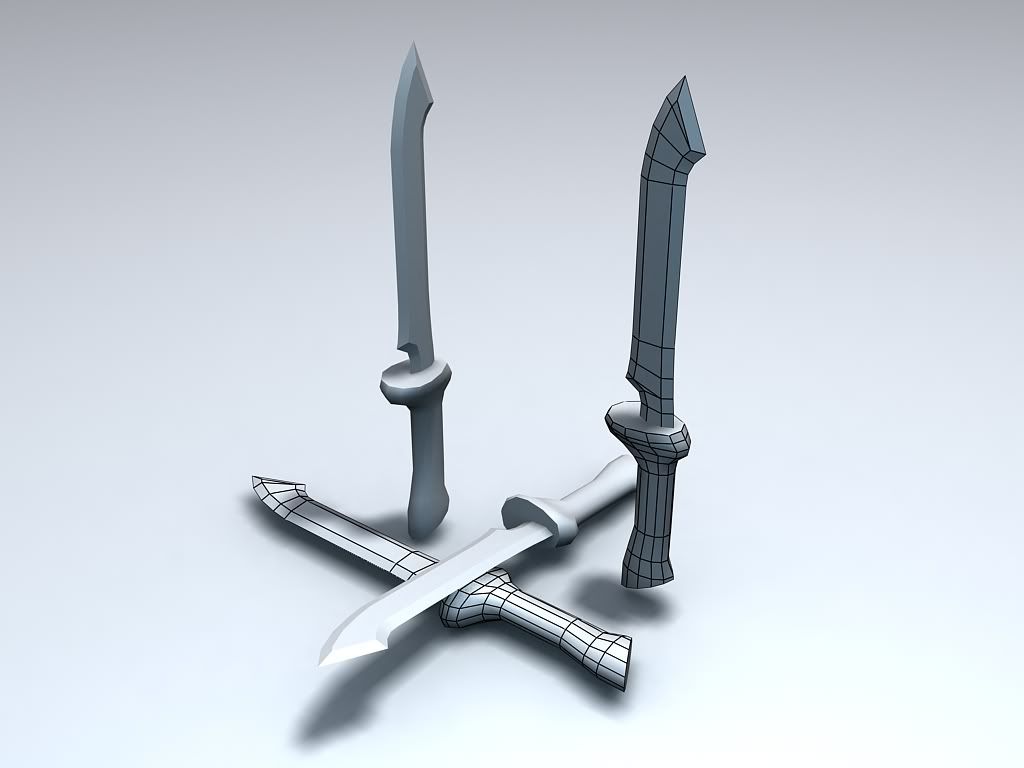
way too low poly everywhere.Quote:
Originally Posted by Advancebo
He's modelling the Halo 1 Machete so he can put it into an existing gbxmodel of a gun and use the machete as the melee weapon I believe. The gun already has a decent poly count so I think bo's trying to keep the poly count low.
Well if that's the case he should say so. AFAIK, you have to match the number of vertices of the original weapon, so making it higher/lower poly wouldn't work.
If he isn't doing that, then it's too low poly.
So I should make a little machete, 3382 Tris/1656 Polys and 1802 verts?
Having the same number of vertices doesn't translate to the same number of tris/polies. From what i remember you're trying to match the vertice count.
Reminds me of the sniper from Tribes: VengeanceQuote:
Originally Posted by Hunter
http://www.the-junkyard.net/images/w...niperrifle.jpg
They're both ugly.
Some WIP map based off that map from Marathon.


Reflex Sight Unwrap:
Model by me
http://i435.photobucket.com/albums/q...tenormal-1.jpg
And, because the render doesn't show most of the details for some strange reason:
http://i435.photobucket.com/albums/q...gateclay-1.jpg
Also, it seems to me that the render makes my new bitmap look funny as well:
http://i435.photobucket.com/albums/q...wlovesrest.png
Nonplanar errors circled in red:
http://i218.photobucket.com/albums/c...nonplanars.jpg
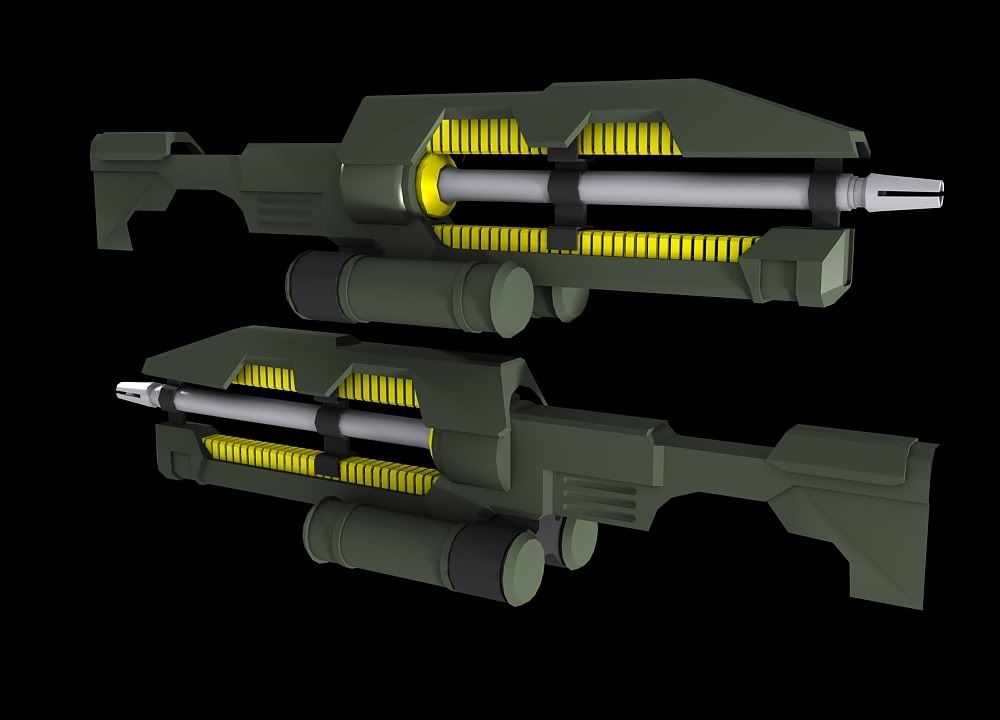
http://i623.photobucket.com/albums/t...ff/derpgun.jpg
the result of 3 hours of dicking around a bit.
thought the design looked pretty cool, and decided to go see where i could take it.
sorry hunter, though I doubt you will be offended, but his looks way nicer.Quote:
Originally Posted by neuro
bit of an update:
http://i623.photobucket.com/albums/t...f/derpgun2.jpg
I personally don't like that gun's concept, it has too many hard edges for my liking. It doesn't really make sense either.
lol road barrier.
http://img130.imageshack.us/img130/8527/fdhafh.pngQuote:
Originally Posted by Advancebo
I re-unwrapped the scope yo.
ty yo
Think I might pack in modelling, I can only seem to copy other models. Will see what happens with this warthog once I bothered to draw some ideas...
Oh, and looked into that ADHD, seems I have it Lol. My mum said she always knew I had it, oh well. Lol.
Quit being a downer sir.Quote:
Originally Posted by Hunter
welpQuote:
Originally Posted by Hunter
suck it up. you're better than most people 'round these parts.Quote:
Originally Posted by Hunter
just find some nice concept online, and build it, something NOT halo.
copy from a picture, not from a game.